Introduction
Gateway to the epigenome. (Art by Ting Wang)
The basic usage of the WashU Epigenome Browser involves the following steps:
- Load a genome assembly – Users can select from a variety of preloaded genome assemblies or upload their own custom genome using the Genome Hub feature.
- Load annotations and public data tracks – The Browser provides access to publicly available datasets from major consortia like ENCODE, 4DN, Roadmap Epigenomics, and IHEC, allowing users to integrate rich annotation tracks.
- Load user's data – Users can visualize their own data through the Remote Track function (by providing a URL to a hosted file) or the Local Track function (by uploading files directly from their computer).
This documentation provides a step-by-step guide to using the 2025 updated WashU Epigenome Browser.
History
current generation since 2025
the 2nd generation since 2018
the 1st generation since 2010
Run the Browser locally
-
get Node.js (version 20 above recommended) and yarn package management tool
-
clone the code
-
install the package at root folder
yarn install -
go the eg-browser folder
yarn install
yarn dev -
the browser should be running on your local computer now at http://localhost:5173/
VITE v5.4.14  ready in 409 ms

➜  Local:   http://localhost:5173/
➜  Network: use --host to expose
➜  press h + enter to show help
Use the Browser as a module in your web application
-
install the package from NPM registry
npm install wuepgg -
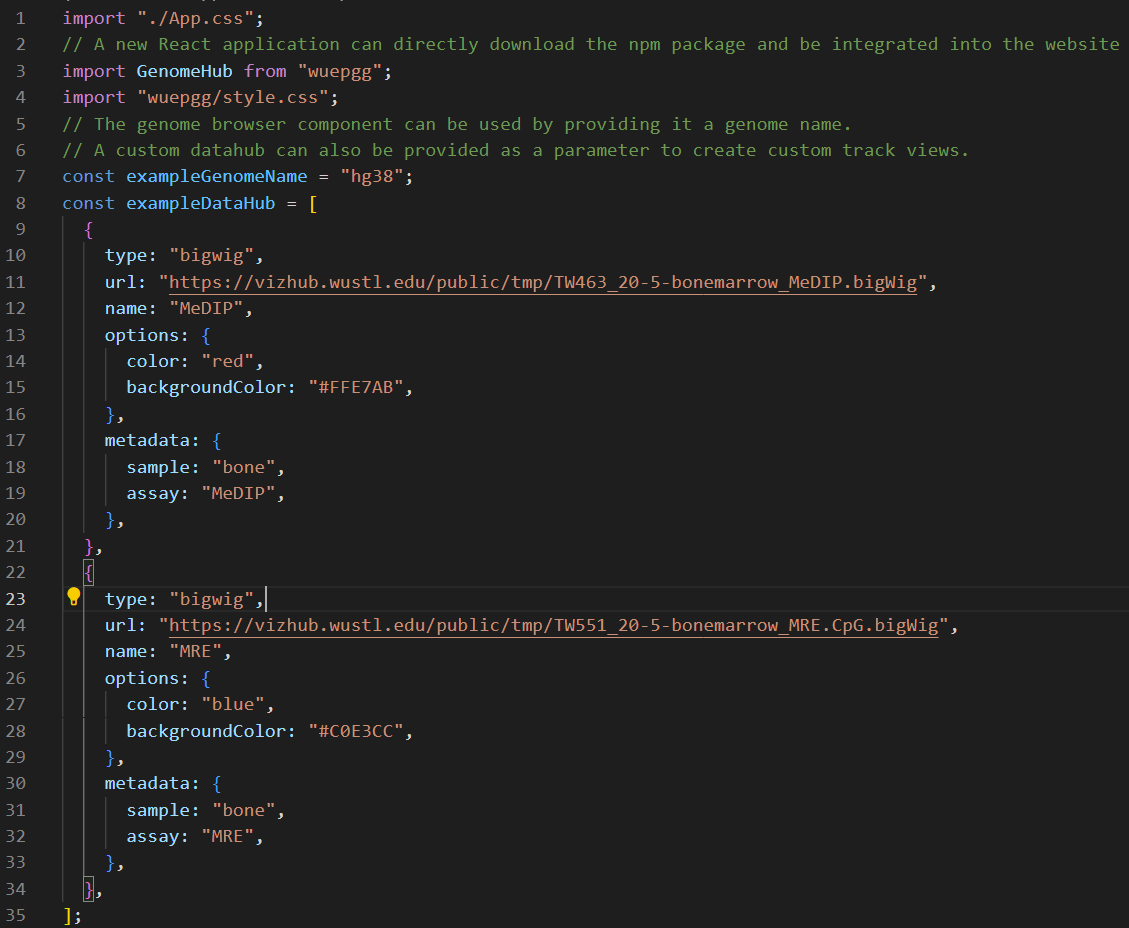
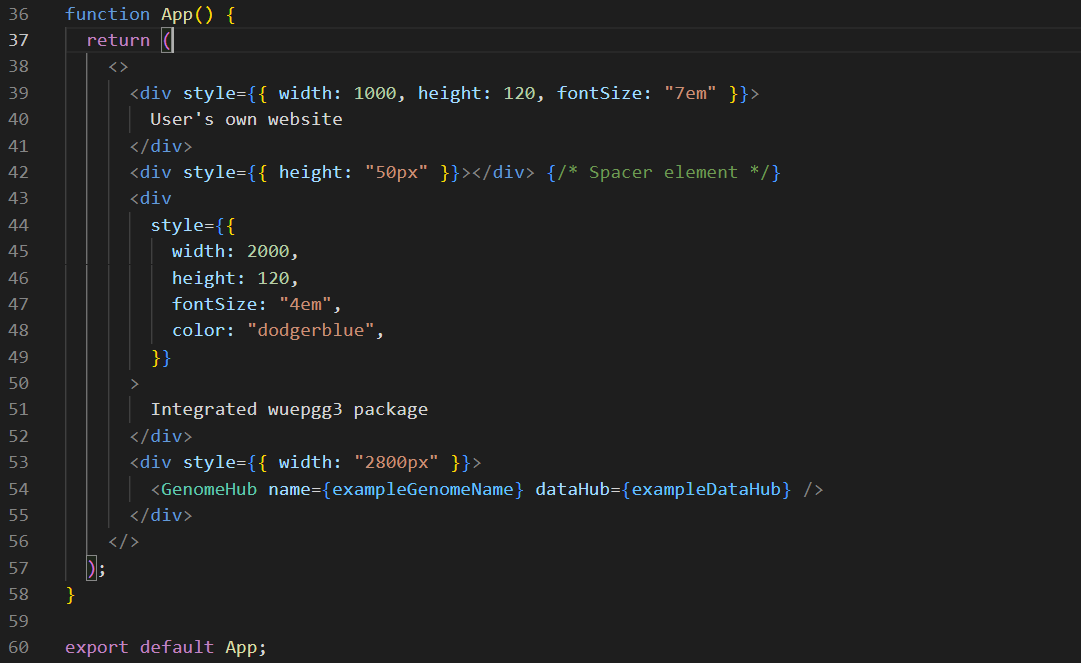
import the package and related style sheet
import GenomeHub from "wuepg"
import "wuepgg/style.css"
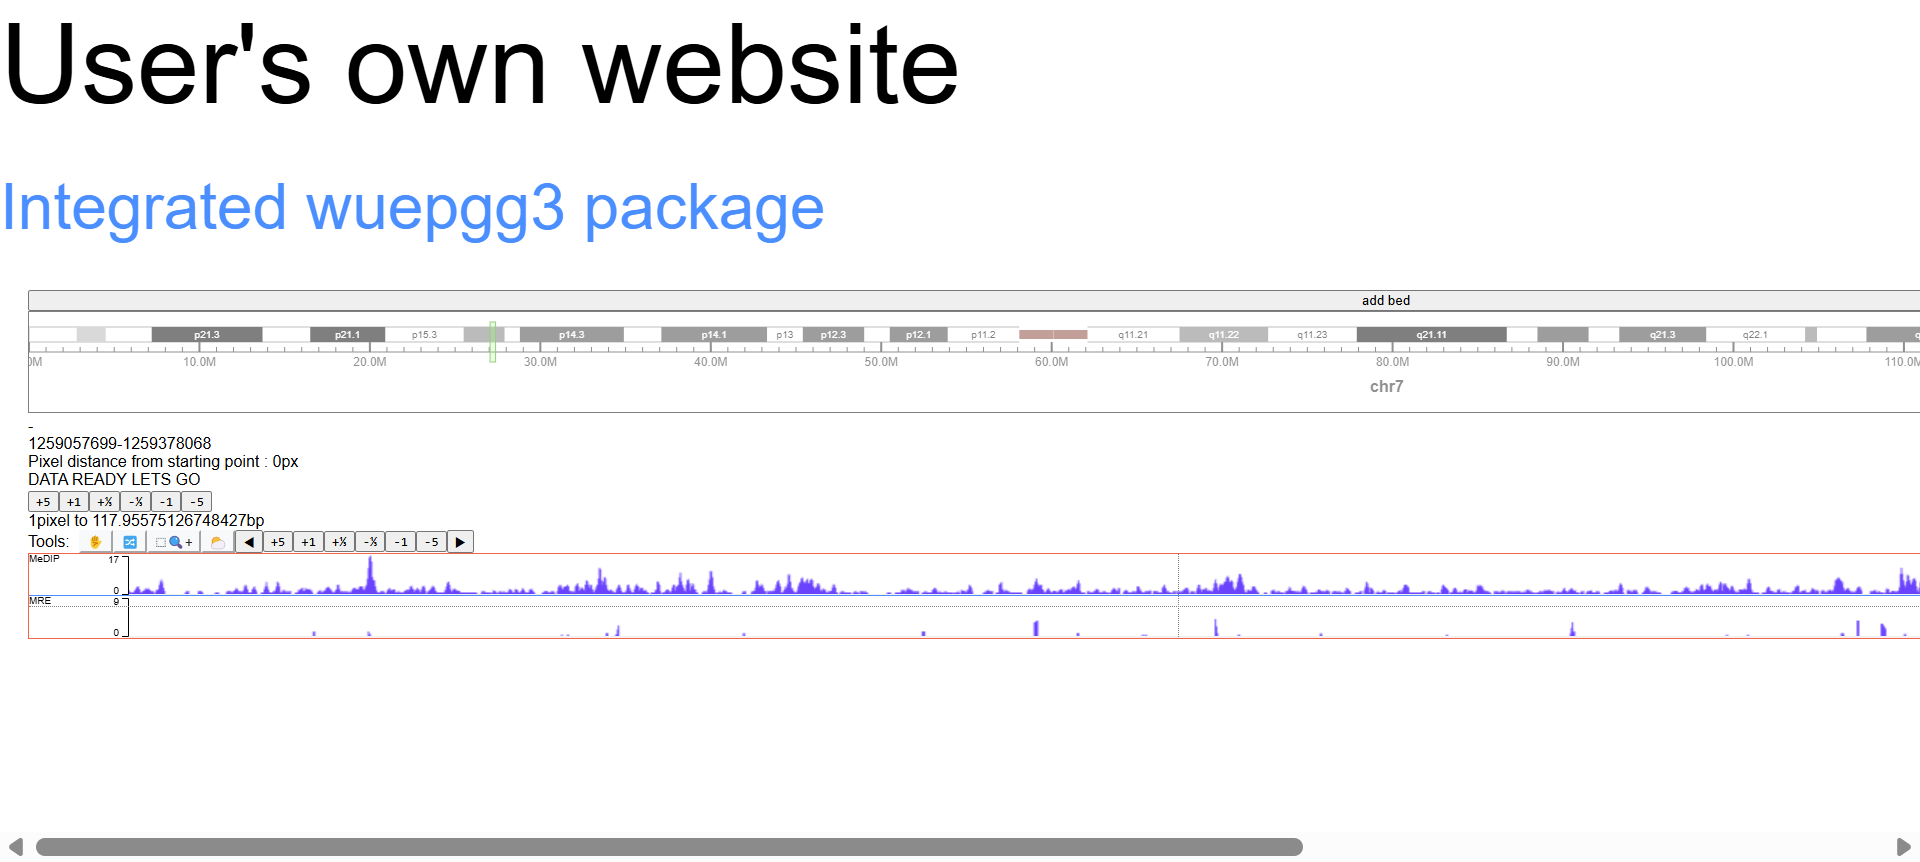
<GenomeHub name={exampleName} dataHub={exampleDataHub} /> -
example of screenshot for each step can found below:

Questions or feedbacks?
- Please submit an issue request. We'll try to get back to you asap.
Community
- Talk to us? Welcome to join our Discord server for some discussion.